
So, last week was my birthday. And you know what that means:
B I R T H D A Y C A K E ! ! !


I did my research and decided on this sweet and salty number. It was pretty amazing. And very rich. I suggest either a strong cup of coffee to enjoy with it or a glass of milk. The cake is very moist, rich, dark and chocolaty. And then you spread caramel on top of each layer. And then slather salted caramel chocolate frosting on top of each layer as well as frost the cake altogether. Definitely make it a day ahead of time and keep refrigerated. You will not be disappointed.
Chocolate & Salted Caramel Cake
Cake Ingredients:
3/4 Cup Cocoa Powder
1 and 1/4 Cup Hot Water
2/3 Cup Sour Cream
2 and 2/3 Cup All-Purpose Flour
2 Teaspoons Baking Soda
1 Teaspoon Salt
3/4 Cup Butter (unsalted), softened
1/2 Cup Shortening
1 and 1/2 Cup White Sugar
1 Cup Brown Sugar
2 Large Eggs, room temp
1 Teaspoon Vanilla
Step 1: Preheat the oven to 350 degrees Fahrenheit. Prepare two 9-inch round cake pans. I use silpats in the bottom of mine - but you can grease and flour the pans instead.
Step 2: In a bowl, combine the sour cream and cocoa powder. Slowly stir in the hot water. Stir together until well blended. Set aside until needed later.
Step 3: In large mixing bowl, add the butter and shortening - beat until smooth and well combined. Then add the white sugar and brown sugar and beat again until smooth and fully incorporated.
Step 4: In a seperate bowl, combine the flour, baking powder, baking soda and salt.
Step 5: This is where you will combine the flour mixture and cocoa mixture with the creamed mixture. To being, add 1/2 the flour and incorporate until well blended. Add 1/2 the cocoa mixture and mix well. Add remaining flour mixture and mix well. Add remaining cocoa mixture and mix well. Be sure to always scrape down the bowl between additions.
Step 6: Divide the batter among the baking pans and bake for 25-35 minutes. Ovens may vary, so be sure to test for doneness. Once baked, remove from oven and cool completely.
Caramel Ingredients:
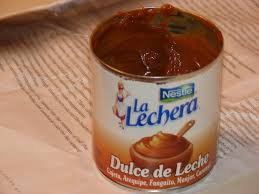
1 Can of Dulce de Leche (I buy mine at our local grocery store in the Hispanic section)
If you cannot find this product, you will want to use a very thick yet soft caramel.
Chocolate & Salted Caramel Ingredients:
1/2 Teaspoon Kosher Salt
1 LB Semi-Sweet Chocolate Chips
1 and 1/2 Cup Heavy Cream
2 Cups Butter (slightly softened, but yet cool and cut into tablespoon chunks)
Step 1: Add the chocolate chips to a large mixing bowl as well as 1/2 the can of dulce de leche.
Step 2: Heat the cream in a small saucepan until boiling. Add the salt and stir to combine.
Step 3: Carefully pour the cream over the chocolate chips and caramel. Cover the bowl and let stand for 5 minutes.
Step 4: Uncover the bowl and stir the mixture with a large spatula/rubber scraper. Stir until combined, but don't fret about getting it fully incorporated. Just stir it enough to get it mixed up - then beat it with the electric mixer until smooth. Start on low and slowly increase the speed to medium and beat for roughly 5 minutes, until it is fully cohesive and incorporated. Next, while the mixer is still on medium speed - add one tablespoon of butter and beat until well combined. Continue to add the butter, 1 piece at a time and incorporated, until all the butter has been added. Continue to beat for approximately 5 minutes until fluffy and smooth. Refrigerate until ready for cake assembly.
To Assemble the Cake:
Step 1: Chill the cake layers for at least a few hours. This will really help you with the assembly.
Step 2: Carefully slice each layer in half to make 4 rounds. I should have take pictures, but I didn't (bad blogger!). To do so, take a ruler and mark 1/2 up the side of the cake and insert a toothpick. Do this four times around the cake (spaced as if there were a north, south, east and west). Carefully, with a sharp serrated knife, score the cake by "connecting the toothpicks" with the knife. Once you've made that score, carefully slice through the cake. You will know have two pieces. Repeat this process with the other cake.
Step 3: Place one cake on a large plate or cardboard round. Carefully spread 1/3 of the caramel (dulce de leche) across the top of the cake. To make it easy spread, you can heat it up a little bit in the microwave or a saucepan. Next, spread about 1 cup of the frosting on top of the caramel. Do not spread to the edges - only go about 1/2 from the edge. The frost will disperse itself when you add the next layer of cake.
Step 4: Place the next cake round on top of the first frosted round. Repeat the above steps by spreading on the caramel and then the cake. You will do this again with the next layer. Once you have three layers of cake topped with the caramel and frosting, add the last cake layer.
Step 5: Frost the sides of the cake sparingly (crumb coat). I recommend using an offset spatula if you have one. Then, frost the top the cake sparingly. Once it looks smooth, frost the cake again with the remaining frosting - starting with the sides and finishing with the top of the cake.
Step 6: Decorate the cake at one's own will. It would be beautiful with some chocolate shavings. We decided to pipe out some words on it :)
Keep this cake in the fridge! The frosting is very delicate. Let it come to room temp to serve. Enjoy.
And .. . Happy Birthday to Me :)

1 and 1/4 Cup Hot Water
2/3 Cup Sour Cream
2 and 2/3 Cup All-Purpose Flour
2 Teaspoons Baking Soda
1 Teaspoon Salt
3/4 Cup Butter (unsalted), softened
1/2 Cup Shortening
1 and 1/2 Cup White Sugar
1 Cup Brown Sugar
2 Large Eggs, room temp
1 Teaspoon Vanilla
Step 1: Preheat the oven to 350 degrees Fahrenheit. Prepare two 9-inch round cake pans. I use silpats in the bottom of mine - but you can grease and flour the pans instead.
Step 2: In a bowl, combine the sour cream and cocoa powder. Slowly stir in the hot water. Stir together until well blended. Set aside until needed later.
Step 3: In large mixing bowl, add the butter and shortening - beat until smooth and well combined. Then add the white sugar and brown sugar and beat again until smooth and fully incorporated.
Step 4: In a seperate bowl, combine the flour, baking powder, baking soda and salt.
Step 5: This is where you will combine the flour mixture and cocoa mixture with the creamed mixture. To being, add 1/2 the flour and incorporate until well blended. Add 1/2 the cocoa mixture and mix well. Add remaining flour mixture and mix well. Add remaining cocoa mixture and mix well. Be sure to always scrape down the bowl between additions.
Step 6: Divide the batter among the baking pans and bake for 25-35 minutes. Ovens may vary, so be sure to test for doneness. Once baked, remove from oven and cool completely.
Caramel Ingredients:
1 Can of Dulce de Leche (I buy mine at our local grocery store in the Hispanic section)
If you cannot find this product, you will want to use a very thick yet soft caramel.
Chocolate & Salted Caramel Ingredients:
1/2 Teaspoon Kosher Salt
1 LB Semi-Sweet Chocolate Chips
1 and 1/2 Cup Heavy Cream
2 Cups Butter (slightly softened, but yet cool and cut into tablespoon chunks)
Step 1: Add the chocolate chips to a large mixing bowl as well as 1/2 the can of dulce de leche.
Step 2: Heat the cream in a small saucepan until boiling. Add the salt and stir to combine.
Step 3: Carefully pour the cream over the chocolate chips and caramel. Cover the bowl and let stand for 5 minutes.
Step 4: Uncover the bowl and stir the mixture with a large spatula/rubber scraper. Stir until combined, but don't fret about getting it fully incorporated. Just stir it enough to get it mixed up - then beat it with the electric mixer until smooth. Start on low and slowly increase the speed to medium and beat for roughly 5 minutes, until it is fully cohesive and incorporated. Next, while the mixer is still on medium speed - add one tablespoon of butter and beat until well combined. Continue to add the butter, 1 piece at a time and incorporated, until all the butter has been added. Continue to beat for approximately 5 minutes until fluffy and smooth. Refrigerate until ready for cake assembly.
To Assemble the Cake:
Step 1: Chill the cake layers for at least a few hours. This will really help you with the assembly.
Step 2: Carefully slice each layer in half to make 4 rounds. I should have take pictures, but I didn't (bad blogger!). To do so, take a ruler and mark 1/2 up the side of the cake and insert a toothpick. Do this four times around the cake (spaced as if there were a north, south, east and west). Carefully, with a sharp serrated knife, score the cake by "connecting the toothpicks" with the knife. Once you've made that score, carefully slice through the cake. You will know have two pieces. Repeat this process with the other cake.
Step 3: Place one cake on a large plate or cardboard round. Carefully spread 1/3 of the caramel (dulce de leche) across the top of the cake. To make it easy spread, you can heat it up a little bit in the microwave or a saucepan. Next, spread about 1 cup of the frosting on top of the caramel. Do not spread to the edges - only go about 1/2 from the edge. The frost will disperse itself when you add the next layer of cake.
Step 4: Place the next cake round on top of the first frosted round. Repeat the above steps by spreading on the caramel and then the cake. You will do this again with the next layer. Once you have three layers of cake topped with the caramel and frosting, add the last cake layer.
Step 5: Frost the sides of the cake sparingly (crumb coat). I recommend using an offset spatula if you have one. Then, frost the top the cake sparingly. Once it looks smooth, frost the cake again with the remaining frosting - starting with the sides and finishing with the top of the cake.
Step 6: Decorate the cake at one's own will. It would be beautiful with some chocolate shavings. We decided to pipe out some words on it :)
Keep this cake in the fridge! The frosting is very delicate. Let it come to room temp to serve. Enjoy.
And .. . Happy Birthday to Me :)


